

Find out how to save your favourite stickers and have them quickly to hand in a sticker book. This tutorial will walk you setting up a new document in Noteshelf, adding stickers, resizing them, and then saving the new size ready for next time.
Sticker Books in Noteshelf
Sticker books are great time savers. You choose your favourites and most-used stickers, and collect them in one place, cropped and ready to go.
If you’re not a GoodNotes app user, you may have noticed that many of the kits you buy come with a GoodNotes Sticker Book. This means the designer has added each sticker individually to a GoodNotes document - so they are cropped and sized ready to use - and then exported that document so GoodNotes users can just import and use it. Exporting in a GoodNotes format keeps the stickers ‘loose’ on the page, rather than flattening them into a PDF.
Noteshelf isn’t used as wide for digital planning. As such, you don’t usually see Noteshelf Sticker Books included with kits. It would also be impossible for designers to create sticker books for the multiple apps people use for digital planning and note-taking.
Creating Your Own Sticker Book
Just because Noteshelf sticker books don’t come ready made, it doesn’t mean you can’t make your own!
Sticker books are a real time saver in terms of day-to-day productivity. They do, however, take time to create. You have to see the time spent creating one as an investment in your long-term time management!
To make a sticker book in Noteshelf, you simply create a blank document, add your stickers via your file manger or cloud storage, drag these into your planner to resize, and then copy that new size back to your sticker book.
Next time you need a sticker, you grab the pre-sized and pre-cropped version from your sticker book. Quick and easy.
Make a Sticker Book in Noteshelf - Step-by-Step
Create your Blank Sticker Book
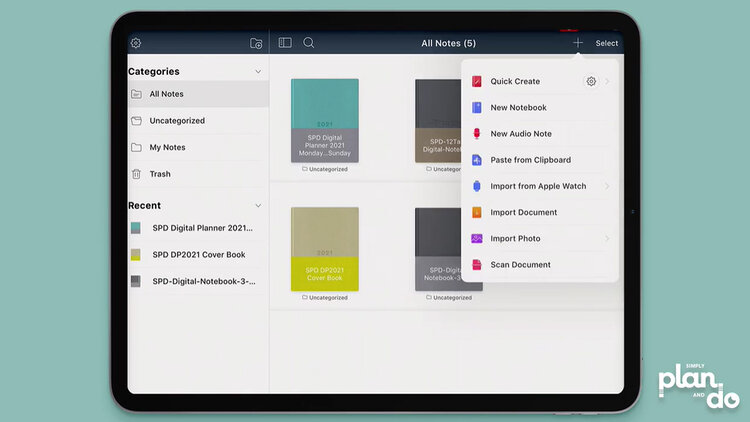
- On the file manager page tap the + icon top right and choose Quick Create.
- This will give you a new blank page.
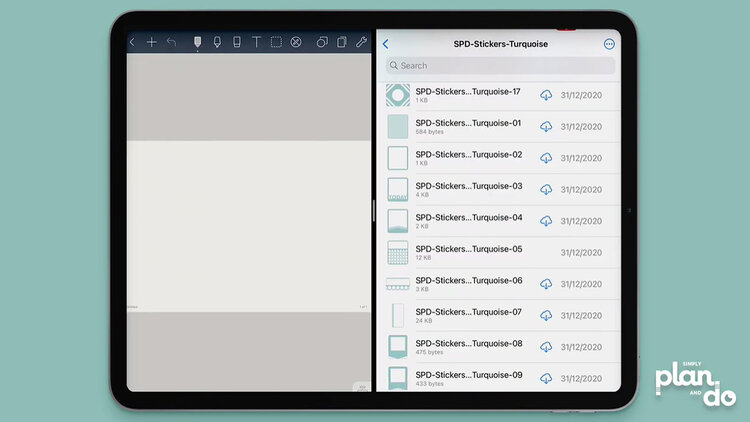
Open your Stickers in Split Screen
- Using split screen, open your file manager or cloud storage and navigate to the stickers you want to add.
- In the video, I’m using the stickers that come with the 2021 Digital Planner. I will resize them later to fit the planner.
Add Stickers to your Blank Sticker Book
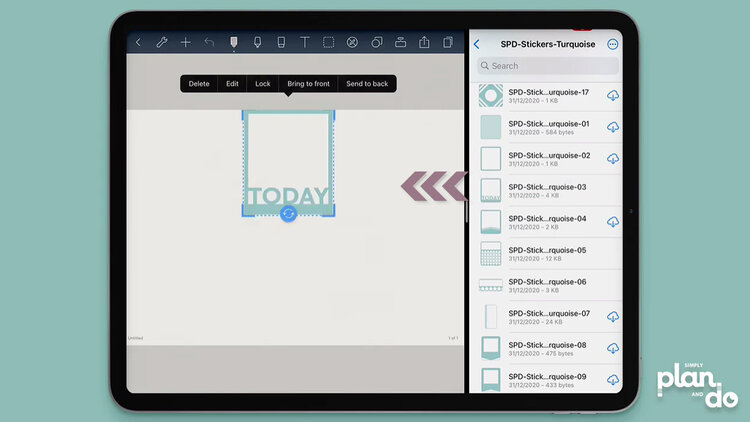
- Drag the stickers you want to use across from the file manager on the right, and drop them on the blank document on the left.
- If you are choosing stickers you know you use in a variety of size, you can leave them the size they are. If they come in particularly big, just shrink them down so they don’t take up too much room.
- If you are adding stickers you always use in the same size - as I am here - don’t worry about resizing at this point. We’ll do that next.
- Once you’ve added all your stickers, you can close the file manager window.
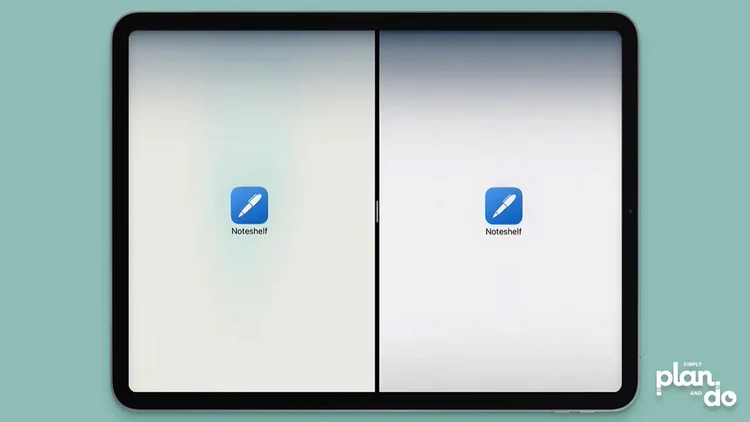
Opening Two Versions of Noteshelf
- If you are not pre-sizing the stickers for a specific planner or notebook, you don’t need to do this step.
- If you want to pre-size the stickers, you now need to split screen with a second window showing Noteshelf.
- On the left screen, you will see your new document and the stickers you have dragged across.
- On the right screen, you need to open the planner/notebook/journal you want to pre-size your stickers to fit.
- In the video, I’m using the stickers from the 2021 Digital Planner, so want to pre-size them for the monthly/week/day spaces on that planner.
Resizing Stickers for a Specific Planner
- On the left, use the Lasso tool to marquee select a sticker. Tap & hold and select Copy.
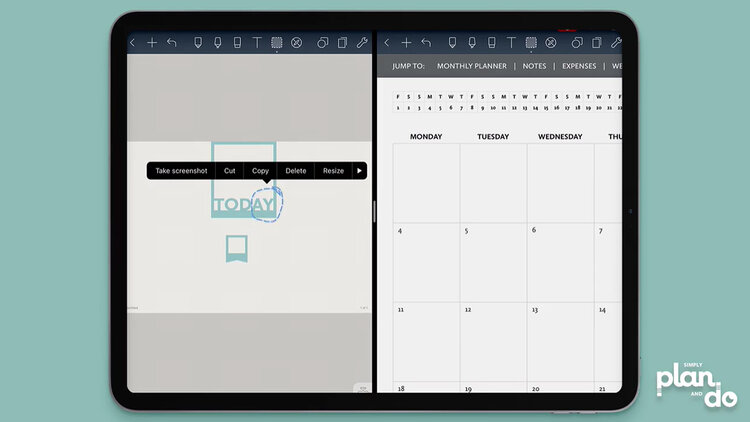
- On the right, Tap & hold and select Paste.
- While the marquee is still active, Tap & hold and select Resize.
- Resize the sticker to fit in the appropriate space.

- You now need to copy this newly-resized version back to your sticker book.
- On the right, Lasso to select the sticker, and then Tap & hold and select Copy.
- On the left, Tap & hold and select Paste.
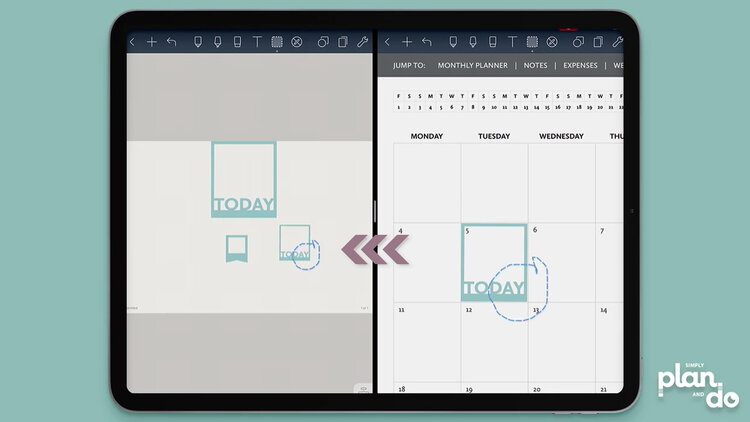
- This sticker will now be ready next time you need it. All you’ll need to do is copy and paste it from the sticker book to your planner or notebook. No resizing necessary!

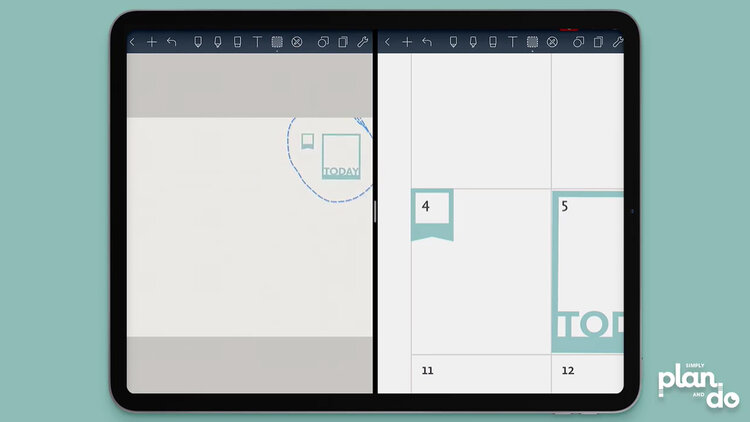
Organise your Stickers
- Once all your stickers that need resizing have been copied back into the sticker book (so, from right to left), you can tidy them up.
Save and Rename your Sticker Book
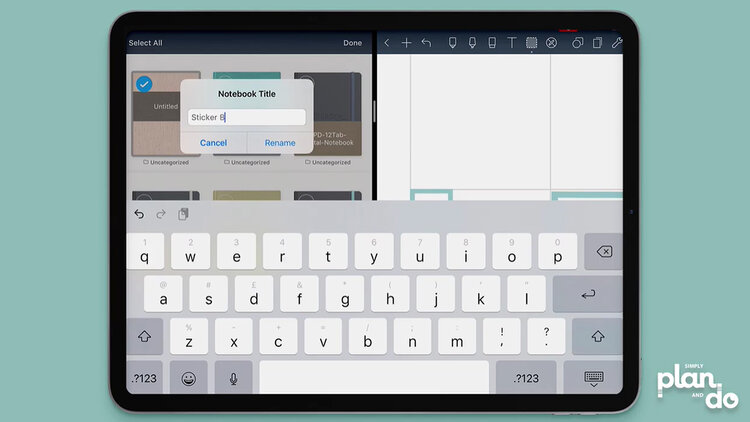
- Go back to your file manager page in Noteshelf.
- Tap Select top-right and choose your new Untitled document.
- Select Rename at the very bottom of the screen and call is Sticker Book.
- If you want to, you can also change the cover.
How to Make a Sticker Book in Noteshelf
Although there’s a little time investment needed, once you have your favourite stickers pre-cropped and resized ready to use, you will really appreciate the benefits of a sticker book!
