

If you use Noteshelf for your digital planning, it’s quick and easy to change the cover of your Digital Planner.
Changing Covers in Noteshelf
In this post, I’ll show you two methods for changing covers:
- Using Noteshelf’s in-built covers.
- Changing a cover on page 1 of a purchased planner.
As a default, Noteshelf uses the Transparent option - this shows you the file name on an overlay, with page one of your document showing on the top.
STAY ORGANISED WHILE LOOKING GOOD!
Click here to see latest Digital Covers in the Shop
Method 1: Using Noteshelf’s Built-in Covers
Noteshelf comes with a range of covers you can use to customise your planners or notebooks.
If you select your planner on the home page, you will see a ‘Cover’ option appear at the bottom of the screen. Alternatively, just click and hold on the planner cover to get a fly-out menu giving you a ‘Change Cover’ option.
Tap on this and scroll through the coloured, patterned, transparent and textured covers, tap the one you want, and you’re done!
You also have the option to create a custom cover right in the app. Scroll to the very bottom of the in-built cover options to find ‘Custom’. Here, you can upload an image from your camera roll and choose one of Noteshelf’s overlay styles.
If you have covers you’ve purchased or designed yourself, or you want to replace a front page someone has supplied as part of their planner (i.e. they’ve made the cover page 1 of the planner), read the step-by-step below to quickly change your cover.
Method 2: Changing a Cover of a Purchased Planner
Changing a Cover in Noteshelf - Step-by-Step
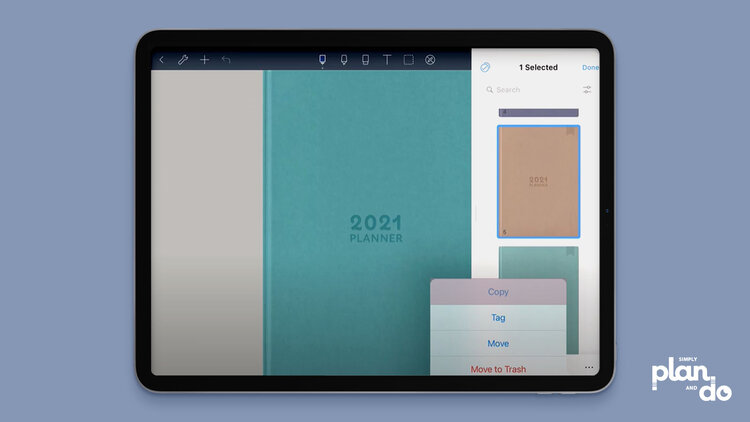
Choose a New Cover
- Open your Cover Book (or individual PDF) and tap the Pages icon, top right.
- Scroll through the pages to find the cover you want.
- Tap Edit, top right, and select the cover you like (you will get a blue box around the cover to show it’s selected).
- Tap More…, bottom right, and choose Copy.
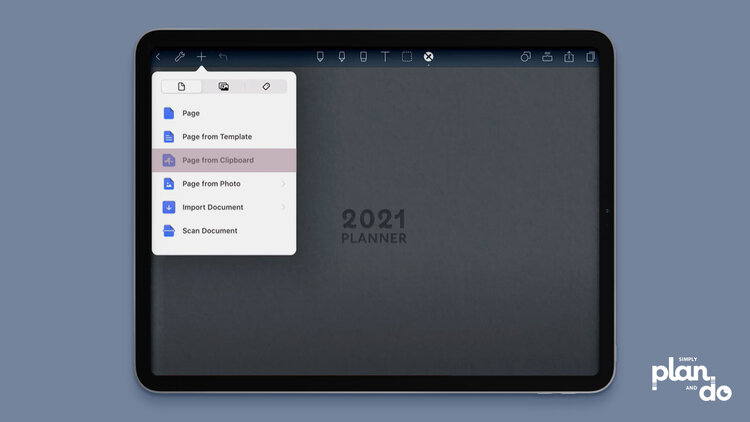
Insert the New Cover in your Digital Planner or Notebook
- Open your Digital Planner or Notebook.
- Make sure you’re on the front page - so, your existing cover or the first page of your planner/notebook.
- Tap the + symbol, top left, and tap Page from Clipboard (i.e. the last page you copied). This will insert your new cover on the next page.
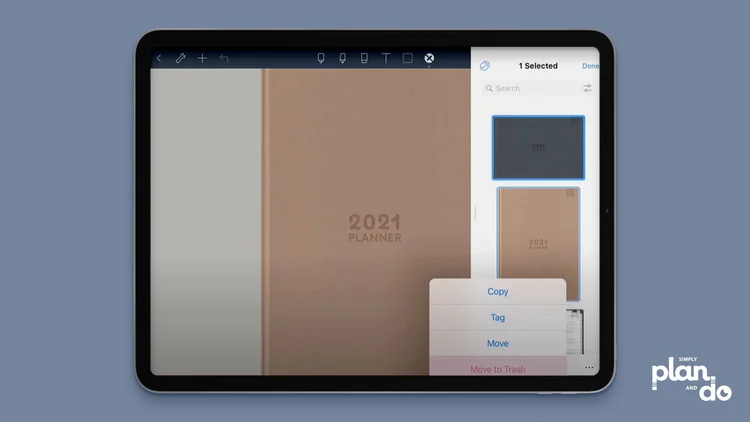
Remove the Old Cover
- Tap the Pages icon, top right, and scroll to find your old cover.
- Tap Edit, and then tap to select your old cover.
- Tap More…, bottom right, and Move to Trash — Move 1 page to Trash.
- You now have a new cover!
Changing Your Planner or Notebook Cover in Noteshelf
As promised, quick and easy!
Although most of us have just one planner a year, having multiple covers is particularly useful for notebooks and journals. It is an easy way to categorise and identify them at a glance.
