

If Noteshelf is your digital note-taking app of choice, then today’s tutorial will show you how to add digital stickers (png or jpeg files) to your planner pages.
Noteshelf and Digital Stickers
Some people love digital stickers. Their digital planner pages are adorned with them not only as productivity aids, but also as decoration.
Others, myself included, use stickers primarily as productivity aids.
I use a few per page and love them for colour coordinating different projects. I create a key using coloured stickers and then copy and paste this onto the day page I’m working on.
If you are new to digital planning, you may have heard of GoodNotes Sticker Books. These are pre-cropped stickers that save you time but, unfortunately, can only be used inside the GoodNotes app (they are saved and sold in the native GoodNotes file format.
No good, however, if you use Noteshelf!
But don’t worry, stickers are always supplied individually as png and/or jpeg files. This means they can be used with any app that allows you to import images.
The step-by-step below will show you how to add individual stickers and widgets inside the Noteshelf app.
Keeping Your Digital Planner Small & Fast
Remember, digital stickers or widgets (basically, any image file) add considerably to your file size. With increased file size comes increased lag time.
If you find your planner is getting sluggish, you may want to look at how many stickers you have in it. If you don’t want to keep pages permanently, you can delete stickers from older pages to lighten the load and speed your planner back up.
If you like to use a lot of stickers, make sure to look for an empty planner that is really small to start with (<3MB).
As I mentioned above, I like to create a mini colour-coordinated key for the projects I’m working on. I create this once and copy it to a new page each day. But, I also delete it from the page before so I don’t end up with one on 365 days of the planner!
If you do want to delete stickers but keep particular pages as a journal page, or perhaps an important memory or special day, you can export the page as a PDF or image. Once saved, you can go back to your working digital planner and delete stickers to speed the planner back up. Just make sure to save it before you delete!
Adding Individual Stickers to pages in Noteshelf - Step-by-Step
Opening your Digital Planner and Stickers
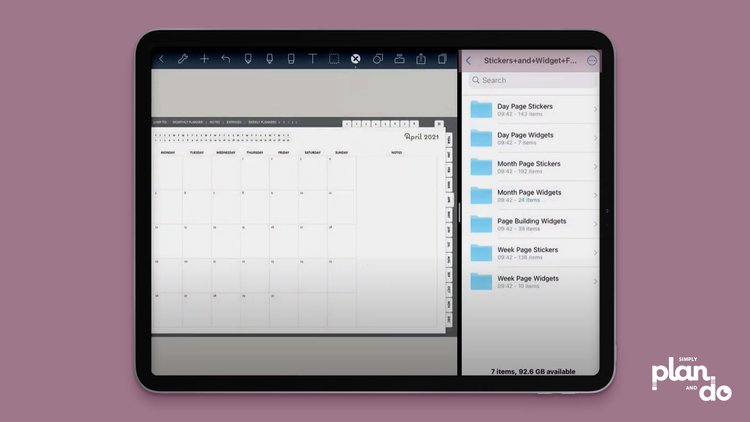
- You will need your sticker (and widget) files saved on your device or stored in the cloud.
- Open both windows at the same time using split screen.
Moving Stickers onto the Planner Pages
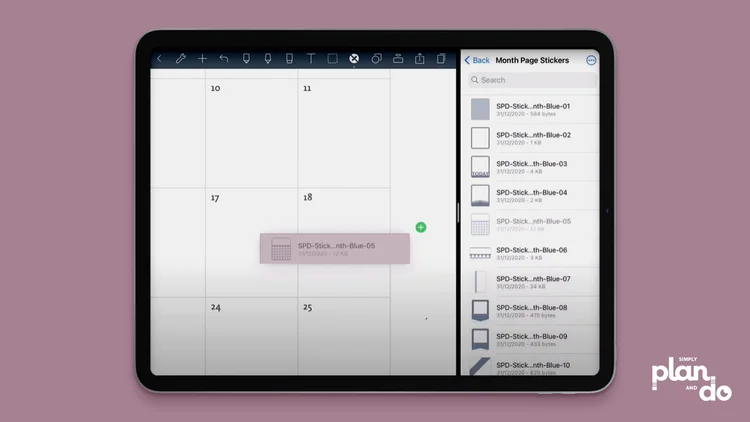
- Navigate to the sticker or widget you want to add to your page.
- Tap, hold and drag from your files to the planner page and then let go. Simple and quick!
Resizing and Repositioning
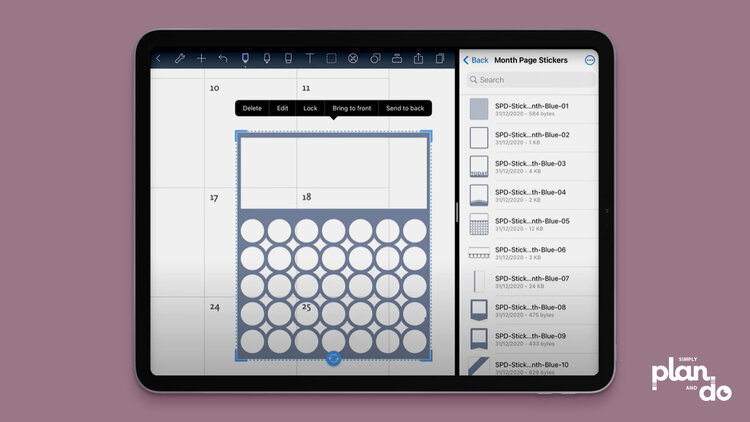
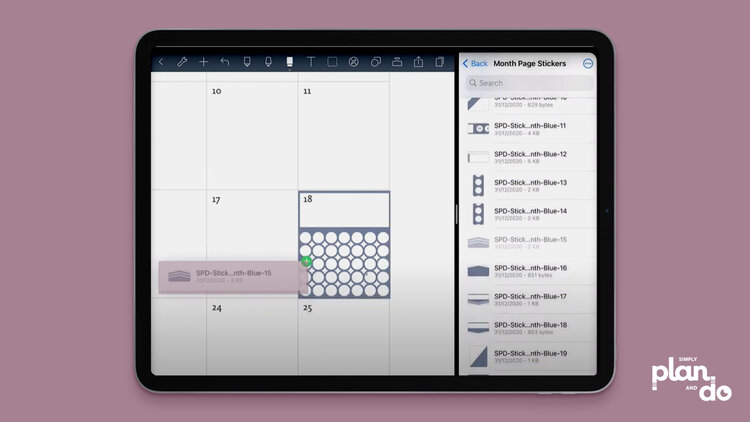
- The stickers will not come in pre-sized - how these apps size imports remains a mystery to me - so you will need to use the corner grab handles to get the size you want and the circle at the bottom to rotate, if you need to.
- While still selected, you can reposition your sticker on the page.
Build Your Page
- Just repeat as many times as you need to, to build the page you want.
- Once stickers have been copied into Noteshelf, you can copy and paste them on to other pages.
- Over time, you’ll collect your favourite set of stickers inside your Digital Planner and will find using stickers much quicker.
- If you have empty sections in your planner (or notebooks), it’s a good idea to pop in your most-used stickers.
Add Your Individual Digital Stickers to Digital Planner Pages in the Noteshelf app
As you can see, it is actually quick and easy to add stickers once you have the knack.
And, over time, you will find your favourite stickers build up in your planner. Once they have, you simply copy and paste them within the app itself, so it gets even quicker. All good news for your productivity!
