

In this tutorial, we’ll look at 8 simple ways you can speed up your workflow in GoodNotes. We all pick up nifty shortcuts and find new tools when we start to play with apps.
Faster Workflow in GoodNotes
Digital planning offers many benefits, including:
- reduced use of paper;
- having multiple planners, journals and notebooks with you wherever you are, all on one small, lightweight device;
- the ability to sync notebooks and planners between devices;
- being able to jump from one section to another in just a couple of taps;
- adding a creative element to your planning with colours, layouts and stickers; and
- saving money, as you can duplicate files to use them over and over again.
Digital planners and notebooks don’t, however, automatically speed up your workflow. Unless, that is, you know a few handy shortcuts and tools!
I’m sure you’ve already found shortcuts of your own. I hope you find a new tip or two to help you speed up a little more.
GoodNotes Workflow Tips - Step-by-Step
Using Hyperlinks in Edit Mode
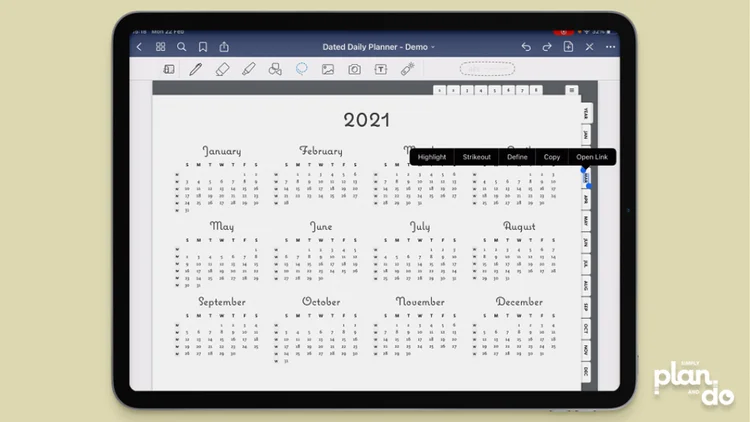
- There is a misconception that you can’t access hyperlinks while in Edit Mode. I’m here to tell you - you can.
- This is a great time saver. It doesn’t sound like much to close edit mode, change page, open edit mode, but it is clunky and slows you down.
- So, if you’re in edit mode and you want to change pages, just Tap & hold on the link to get a pop-up menu.
- Select Open Link to jump to the page.
- We like quick and simple!
2. Move Layered Stickers Individually
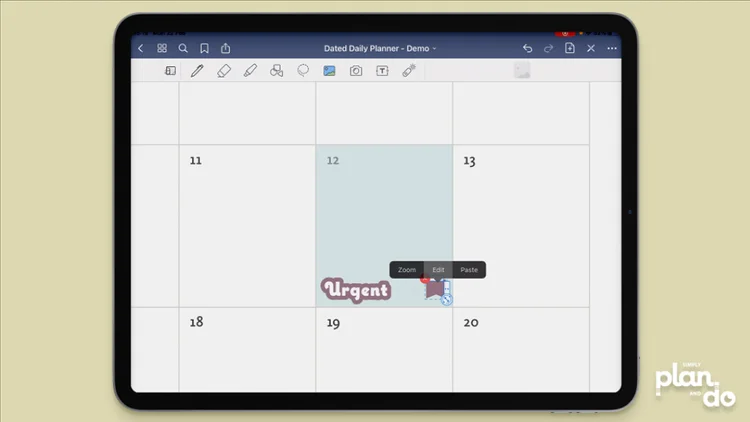
- Stacking stickers on top of each other is so useful. When they are overlapping, however, trying to move just one can be frustrating.
- If you use the Lasso tool to marquee an area, it selects everything that appears on that area of the screen - whether you can see it or not.
- To grab just one sticker, Tap & hold and choose Edit.
- Once in Edit mode, you will be able to resize or move the individual sticker freely, as it it is floating over everything on the page.
3. Master the Lasso Tool
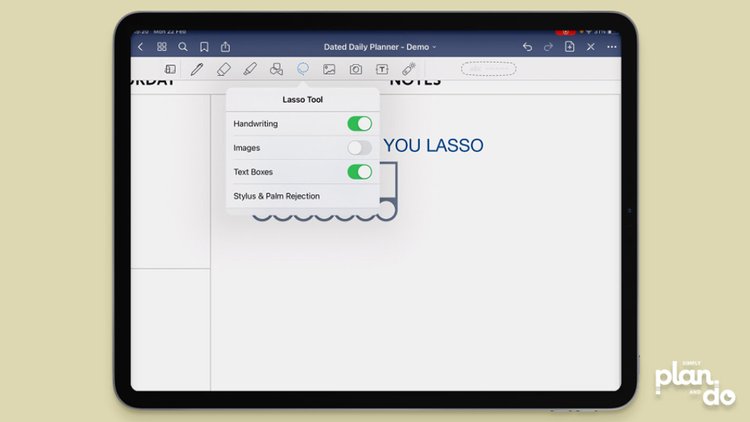
- You will be used to grabbing the Lasso tool, I’m sure. What you may not realise, however, is that it has multiple settings.
- You can choose to select everything or better still, just certain types of content.
- To access the options, Tap & hold the Lasso tool to reveal the menu.
- In this example, if I just want to grab the handwriting, but leave the sticker and type where it is, I can switch off both Images and Text Box. With only Handwriting toggled on, even if I marquee the whole lot, GoodNotes will only select the handwriting.
- Once you get used to switching these on and off, it is a really useful tool.
- I find it particularly helpful if items are close together and I only want to select one.
- On the flip side, if you find you are trying to select something but nothing happens, make sure you have the option toggled on inside the Lasso Tool menu.
4. Master the Eraser Tool
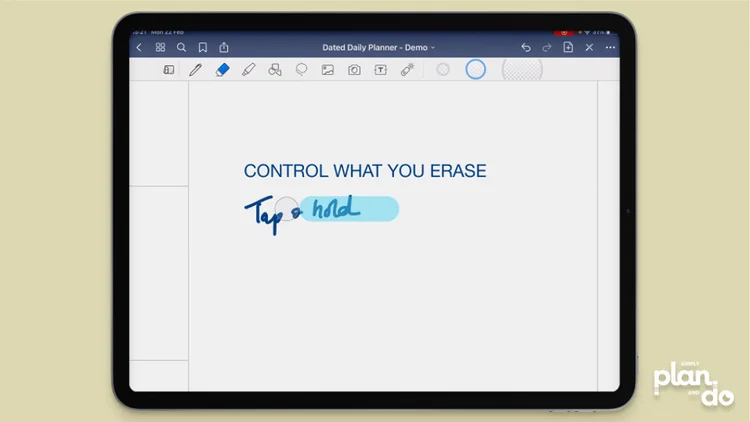
- The Eraser tool also has additional settings if you - you guessed it - Tap & hold.
- My most-used setting for Eraser is Erase Highlighter Only.
- If you have handwriting you’ve highlighted and you want to remove the highlighter only, you just toggle this option on and erase as normal. The handwriting will be left behind and the highlighter removed.
- If you have a long writing session ahead, another option that is incredibly helpful is Auto-Deselect.
- This allows you to jump back to the tool you selected prior to using the eraser, without having to go back to the menu to change tools. You are writing, make an error, tap the eraser to make a change and, the moment you stop erasing, GoodNotes automatically switches you back to the pen you were writing with.
- As with the Lasso tool, if the eraser is not working normally, just make sure to check which options you have switched on.
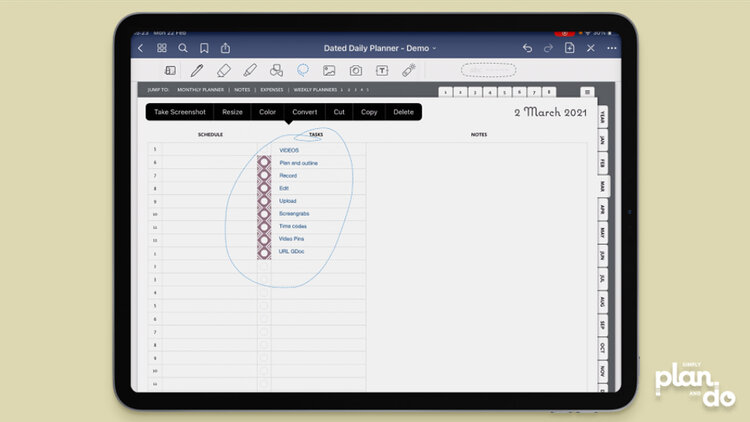
5. Use Ready-made To-do Lists
- If, like me, you have certain tasks that you repeat time and again, creating ready-to-grab to-do lists is a real timesaver.
- I have a process, for example, for creating videos or blog posts. I put these steps into a checklist. I can then take advantage of one of the biggest benefits of digital - copy and paste.
- Unlike paper planners, you don’t need to rewrite a page or list, you can just copy and paste an existing one.
- You can also copy just the remaining items not completed and copy that across to the next day.
- Which leads me on to the next tip…
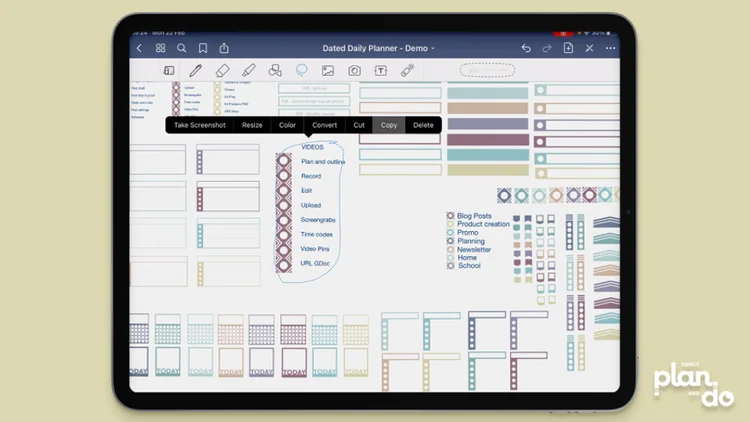
6. Quickly Access Regularly-used Stickers
- Keep ready-made to-do lists, regularly used stickers, colour-coded keys, flags, etc, somewhere they are quick to grab.
- I would suggest having a selection chosen for each planner, notebook or journal you use.
- If I have a video creation morning planned, I jump to one of the extra sections on my planner I’ve dedicated to stickers and to-do lists, marquee the checklist, and copy and paste. Done in seconds.
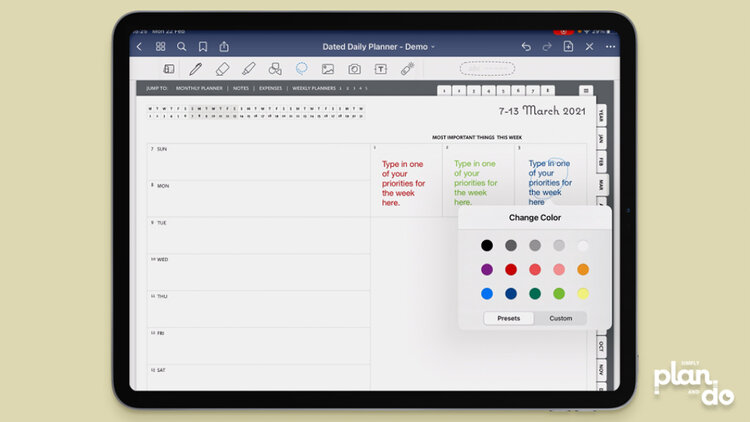
7. Colour-code Blocks of Text
- Colour-coding for me is a key part of my planning. I find having a visual difference between projects helps me know which headspace I’m in and, I can see at-a-glance what I have ahead.
- If you use colour in your planning, you’ll find this tip helpful.
- Just because something is type, it doesn’t mean it can’t use your colour-coded system.
- Use the Lasso tool to marquee a section of a text block, Tap & hold and choose Color.
- You can choose from a range of presets or, better still, add a custom colour that works with your own key.
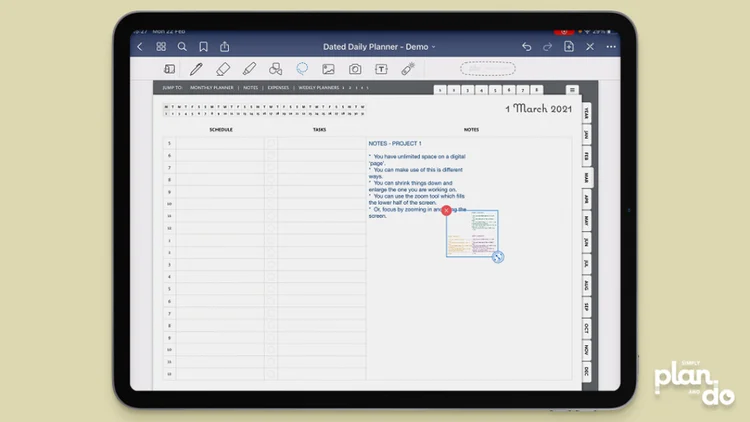
8. Use Resize and Zoom to Focus
- Finally, let’s not forget that we have almost unlimited space on every page. This is digital, after all.
- Here, I have notes for four projects, which I’ve colour coordinated according to my planner key.
- I want to start with the blue project, but don’t want to get distracted by all the other things on the page.
- I can use my Lasso tool to marquee select the other three projects, Tap & hold and select Resize to shrink them and move them down into one of the corners.
- I can then repeat this process with the blue project and enlarge it to fit the space.
- When I’m through with the blue project, I can shrink that and enlarge one of the others.
- A great way to make the most of the space and a great way to stay focussed and on-task.
Faster Workflow in GoodNotes
I hope you’ve come across at least one new shortcut from this list.
Once you get used to shortcuts and tool options, it is surprising how quickly seconds and minutes saved add up.
