If you are trying to move layered stickers in the GoodNotes app, this tutorial will show you how to grab them individually and move them independently of others on your layout.
Moving Overlapping Stickers in GoodNotes
If you’ve ever tried to lasso a single sticker (or text) and managed to move everything nearby in the process, you’ll know the problem I’m talking about.
When you use the lasso tool in GoodNotes, you are not selecting a sticker (or text, or handwriting), you’re actually selecting an area on the screen.
Anything that falls inside that marquee area will be selected - no matter how small, if it is the just the very edge of something, or it is hidden underneath everything else. It all gets grabbed!
The lasso tool doesn’t care how many ‘layers’ there are, it just cares about the flat area on the screen you have selected.
Using Edit to Move Layered Stickers
So, how do you select a specific sticker without being able to see the layers? To select individual stickers, you need to go into edit mode.
Edit mode isolates an object so it can be resized, rotated, deleted or, helpfully, dragged into a new position.
Once a sticker is in edit mode, it can be moved in isolation and appears to ‘float’ over everything else.
Moving Layered Stickers - Step-by-Step
Layering Stickers
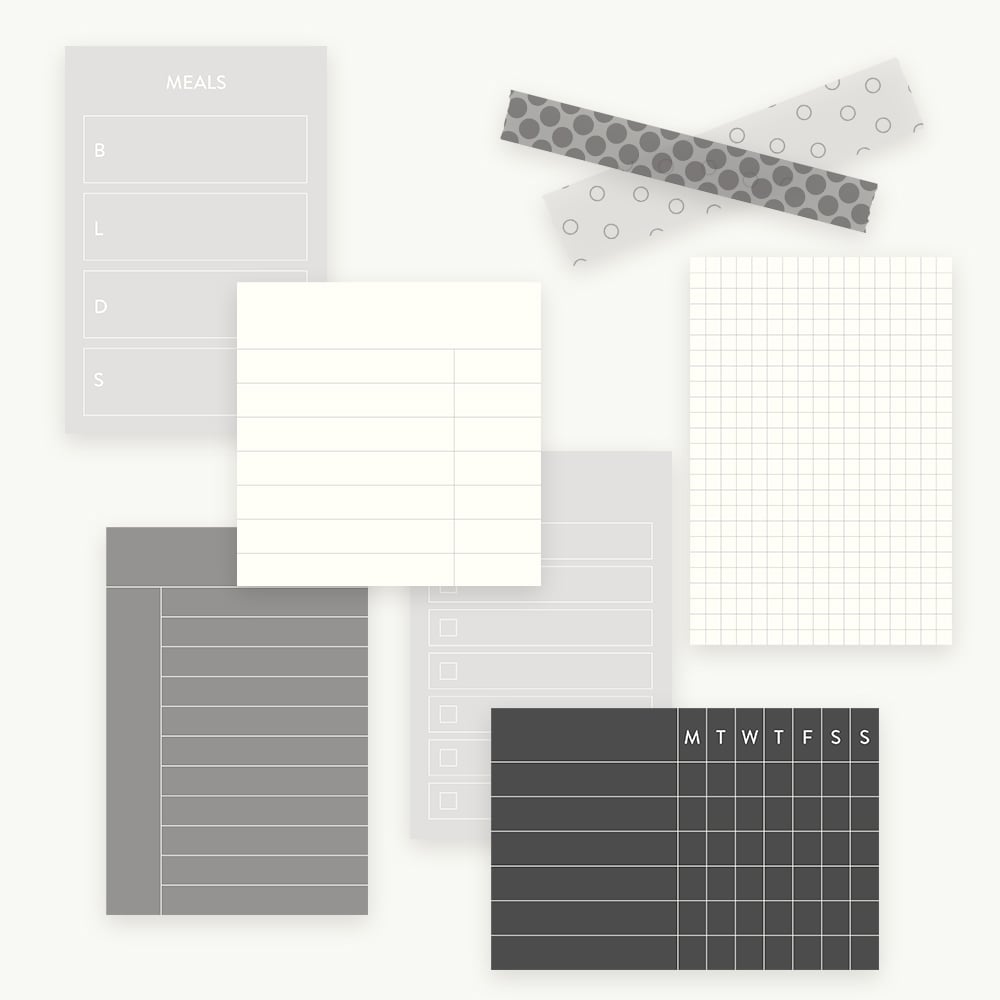
- Layering stickers is really useful. Once layered, however, you need to be able to move things without having to recreate the whole layer stack again.
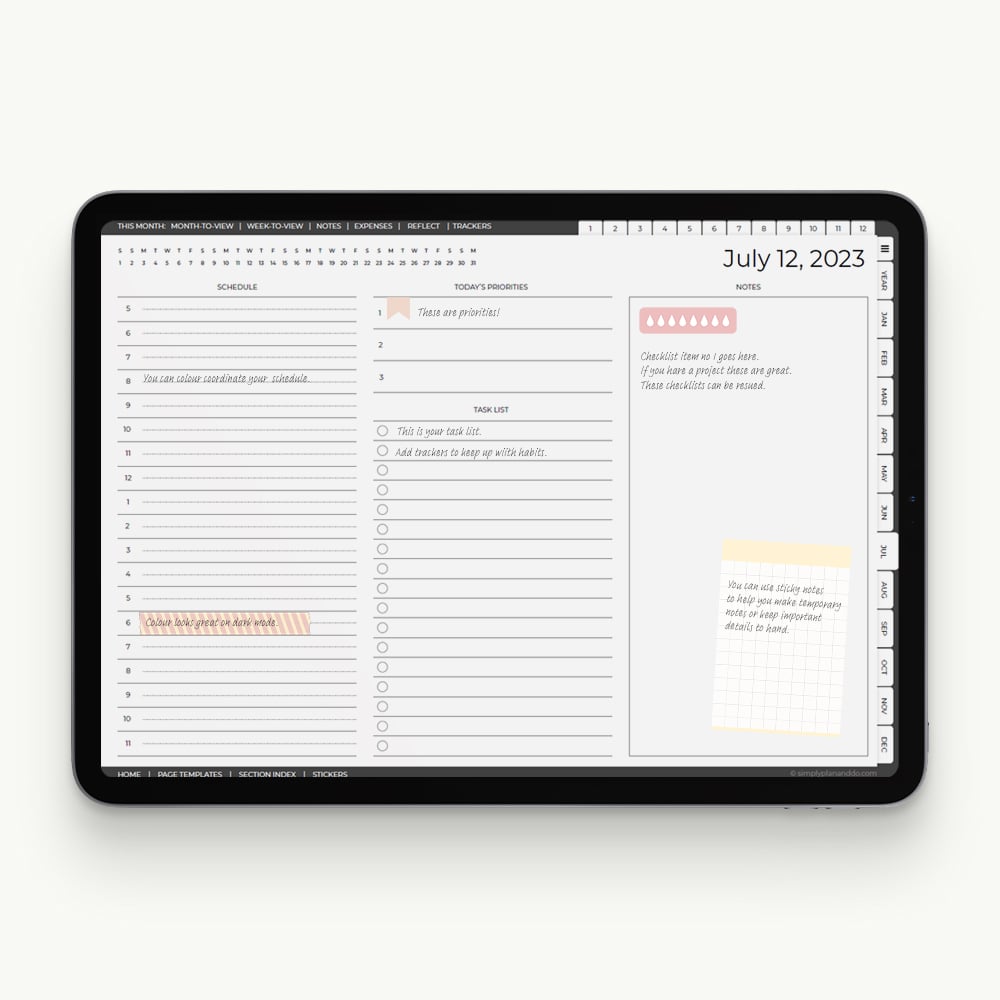
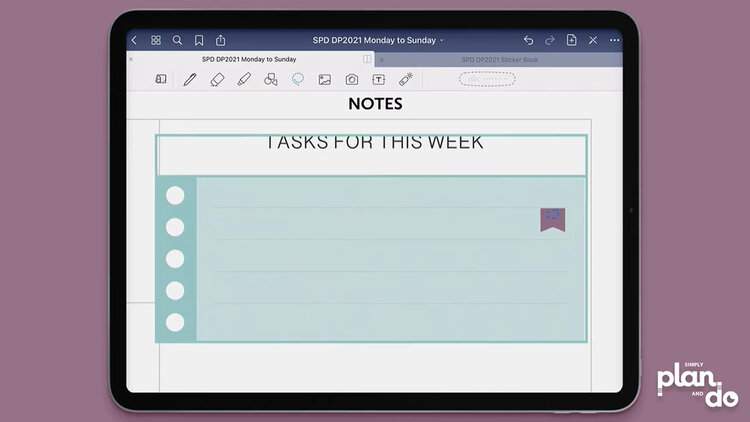
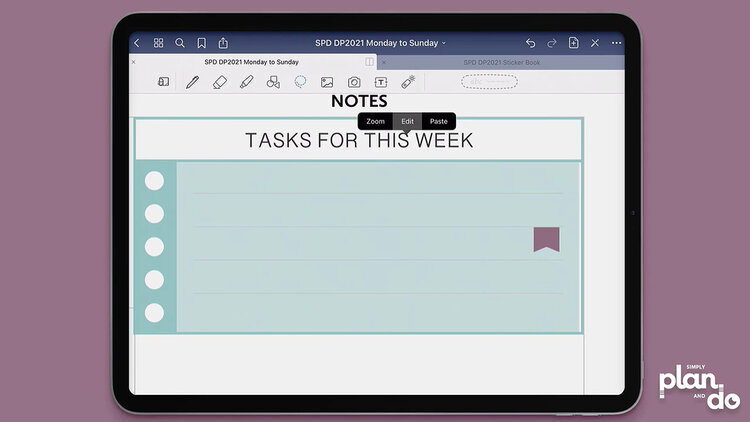
- Here, for example, we have a flag sticker that is sitting on top of a solid block of colour, a checklist sticker, and there is also text.
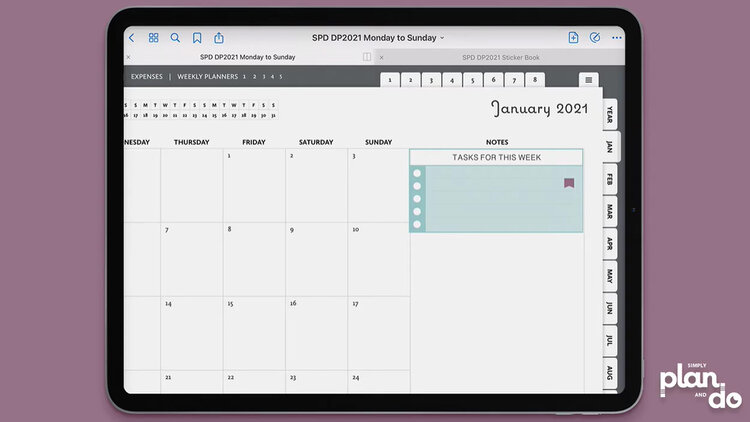
Moving an Individual Sticker
- If we try to move the flag down a line using the Lasso Tool, no matter how small we make the selection, even if that selection remains completely inside the flag, we will move everything down.
Using Edit Mode
- To isolate the sticker, we need to use edit rather than lasso.
- Tap & hold the sticker you want to move and select Edit.
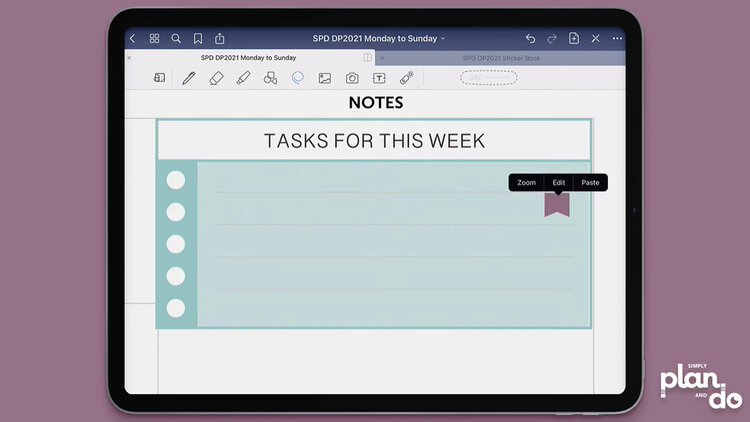
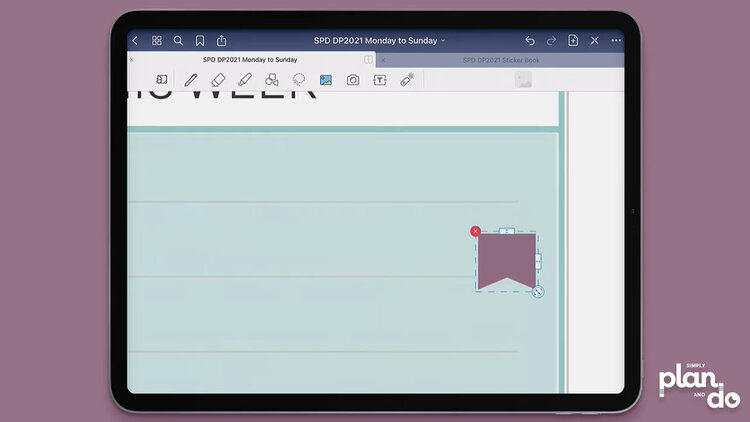
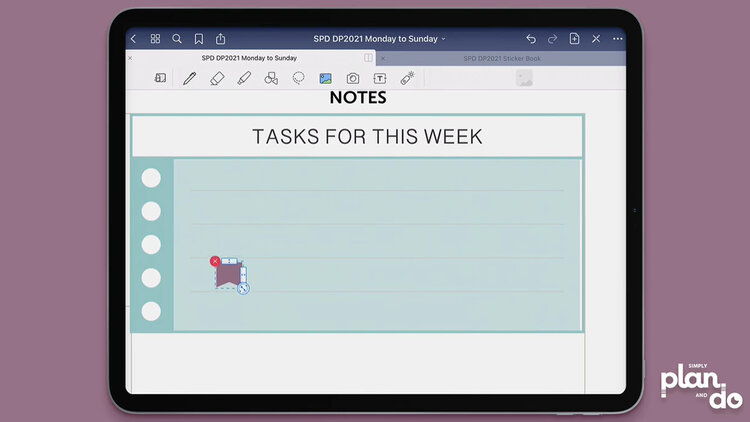
- You will now see the resize and rotate handles, and the delete, top-left.
- Once you see these, just tap and drag the sticker into its new position.
- If the sticker is small, as in this case, it is best to zoom in a little, so you don’t accidentally resize rather than move. (I speak from experience on this one, having squished many a sticker!)
Moving Text
- The same method works for text.
- Just Tap & hold the text block you want to move, and select Edit.
- You can now reposition the text without grabbing anything else.
Using Edit to ‘Float’ Stickers
- Once you are in edit mode, the sticker you’ve selected basically ‘floats’ over the other stickers until you tap outside the sticker to deselect.
- If you find the sticker, when moved, is underneath rather than on top, you will need to change the order of the layers on the screen. You can see how to do that in this video tutorial.
Moving Layered Stickers in the GoodNotes app
No more frustration at grabbing and moving everything on your layout!
Once you get the hang of this, you will find working with stickers a joy and genuine aid to productivity.